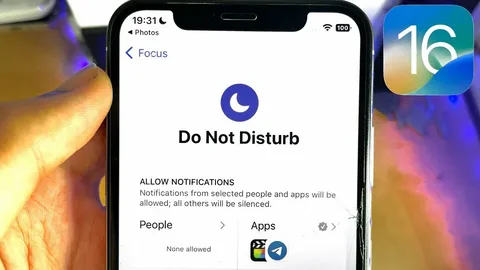
Changing Do Not Disturb on an iPhone is really about controlling when your phone is allowed to interrupt you—and when it should stay completely silent. Apple now bundles this feature under Focus, so you can customize it far beyond just “silencing calls.”
Here’s a clearer, more complete guide so you can actually get the most out of it.
How to Change Do Not Disturb on iPhone (Focus Mode)
Step 1: Open Settings
Open the Settings app on your iPhone.
This is where all system-level controls live, including notifications and Focus modes.
Step 2: Go to Focus
Scroll down and tap:
Focus
This is Apple’s upgraded version of Do Not Disturb, designed for different situations like work, sleep, or personal time.
Step 3: Select Do Not Disturb
Tap:
Do Not Disturb (Focus mode on iPhone)
Inside, you’ll see customization options like allowed notifications, schedules, and automation rules.
Step 4: Customize allowed people and apps
You can decide exactly who or what can break through silence:
- Allow calls from selected contacts
- Allow notifications from important apps
- Silence everything else
This is useful if you still want emergency calls or specific alerts.
Step 5: Set a schedule or automation
Tap Add Schedule or Automation, then choose:
- Time (e.g., 10 PM – 7 AM)
- Location (e.g., work or school)
- App usage (e.g., when opening reading apps)
Your iPhone will automatically turn Do Not Disturb on and off.
Step 6: Control it quickly from Control Center
You don’t always need Settings:
- Swipe down (top-right corner)
- Tap Focus
- Select Do Not Disturb
Instant activation or deactivation.
What happens when Do Not Disturb is ON?
When activated:
- Calls are silenced (unless allowed)
- Notifications don’t light up your screen
- Alerts go straight to Notification Center
- Your phone stays visually and audibly quiet
But:
- Alarms still ring
- Emergency contacts can still break through (if allowed)
Useful tips to get better results
1. Use different Focus modes
Instead of only Do Not Disturb, try:
- Work Focus
- Sleep Focus
- Personal Focus
Each one behaves differently.
2. Allow repeated calls
If someone calls twice in 3 minutes, it can bypass silence—useful for emergencies.
3. Sync across Apple devices
If you use multiple Apple devices, Focus settings can sync automatically.
4. Use automation wisely
Set it based on:
- Time of day
- Location (e.g., office = automatic silence)
Common mistakes to avoid
- Forgetting Focus is ON and missing calls
- Not checking allowed contacts
- Thinking alarms will be silenced (they won’t)
- Not customizing apps, leading to unnecessary silence
Final thought
Do Not Disturb on iPhone is no longer just a simple mute switch—it’s a full control system for your attention. Once you properly set it up, your phone stops being a distraction and starts working around your schedule instead of against it.
If you want, I can also show you how to set a “smart Focus mode” that turns on automatically when you’re sleeping or at work—that’s where it becomes really powerful.